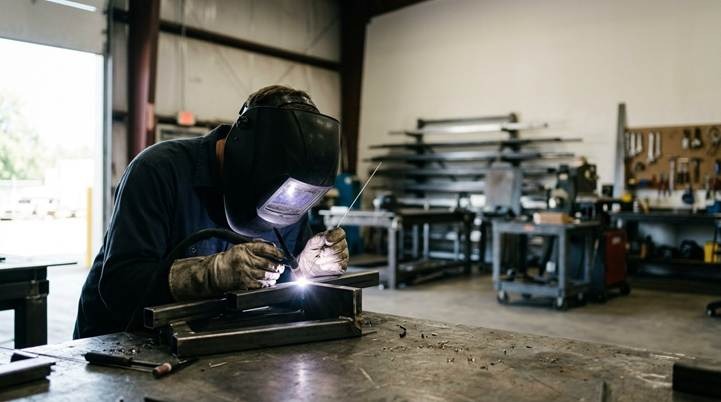
The right safety gear is a critical tool for weld quality and professional efficiency.
By a welding industry contributor. A welding arc is brighter than the sun. It bombards you with infrared and ultraviolet radiation, invisible light that can cause permanent eye damage, including cataracts and retinal burns. Your first line of defense is your welding helmet, but its job is more complex than simply blocking light. It must allow you to see your work clearly before you strike an arc, then darken in milliseconds to protect you during the weld.
This is where many budget helmets fail. An inconsistent auto-darkening filter (ADF) can flicker or leave you seeing spots. Poor optical clarity can make the weld puddle look like a blurry green blob, forcing you to guess where the joint is. This leads to eye strain, headaches, and most importantly, bad welds that need to be ground out and redone. With the median hourly wage for welders at $25.84, per the U.S. Bureau of Labor Statistics, every minute spent on rework is a direct financial loss. This is why professionals evaluate the full range of modern miller helmets not just on price, but on lens technology and reliability.
Quick answer: The right welding helmet is a productivity tool, not just safety gear. Prioritize optical clarity (how clearly you see before, during, and after the weld), a reliable auto-darkening filter with at least two sensors, and comfortable headgear that you can wear for hours without fatigue.
What’s inside
· What’s the real difference between a $50 and a $500 helmet?
· How do I evaluate lens clarity and shade range?
· Are extra sensors and grind modes worth the cost?
· Frequently Asked Questions About Welding Helmets
· The Bottom Line: Your Helmet is a Precision Instrument
What’s the real difference between a $50 and a $500 helmet?
The primary difference is the quality and reliability of the auto-darkening filter and the clarity of the lens. A budget helmet and a premium one may both meet basic safety standards on paper, but their performance during an eight-hour shift is vastly different. The cost difference reflects advanced optics, sensor reliability, and ergonomic design that directly impact weld quality and your own physical comfort.
An inexpensive auto-darkening filter, or ADF, might have only one or two sensors to detect the welding arc. If your view of the arc is obstructed, the lens can fail to darken or flicker back to a light state mid-weld. This causes welder’s flash, a painful condition similar to a sunburn on your cornea. It also forces you to stop, rest your eyes, and restart the weld. A higher-end helmet uses four or more sensors, making it far more reliable when welding out of position or in tight spaces where a sensor might be blocked.
Optical clarity is the other major factor. Modern lenses are rated on a 1-to-3 scale in four categories: optical class, diffusion of light, luminous transmittance variation, and angle dependence. A top-rated 1/1/1/1 lens provides a crisp, clear view of the weld puddle with consistent shading across the entire lens. A lower-rated lens can make the view blurry or distorted, forcing you to guess the state of the puddle. This directly leads to inconsistent welds, undercut, or poor penetration, all of which require costly rework.
This isn’t just about convenience; it’s about professional efficiency. The U.S. Bureau of Labor Statistics reports a median annual wage for welders of $53,750. Every minute spent grinding out a bad weld is a minute you aren’t laying down a good one. The same report projects a modest 2% job growth, indicating a competitive field where skill and efficiency are critical. Investing in a tool that reduces rework and eye strain is a direct investment in your career productivity.
❝ A good rule of thumb: your helmet should let you see the weld joint clearly enough to place your wire or rod precisely before you strike the arc. If you have to lift your hood to see, you’re losing time and risking a bad start to your weld. This is especially true for TIG welding, where arc initiation is critical.
Finally, consider the headgear. A cheap, poorly balanced helmet causes neck strain and headaches over a long day. Premium helmets feature multi-point adjustable headgear that balances the weight and reduces pressure points. It’s a small detail that makes a huge difference in your ability to focus on the work, not on your discomfort.
How do I evaluate lens clarity and shade range?
You evaluate a lens by its optical clarity rating, which is based on the EN 379 standard, and by ensuring its shade range is appropriate for the welding processes you perform most often. These two factors determine how well you can see your work, which directly affects the quality of your welds and the level of eye strain you experience.
The most important number to look for is the optical clarity rating. This is a series of four numbers, with 1 being the best score and 3 being the worst. A perfect rating is 1/1/1/1. Each number represents a different aspect of lens quality:
1. Optical Class: How free of distortion the lens is. A “1” is like looking through clean glass. A “3” is like looking through wavy, imperfect glass.
2. Diffusion of Light: Measures the clarity of the lens, checking for microscopic impurities in the filter’s material that can make the view hazy.
3. Luminous Transmittance: Assesses the consistency of the shade across the entire viewing area. A poor rating means some parts of the lens might be darker than others.
4. Angle Dependence: Checks if the shade remains consistent when you view the arc from an angle. A low rating here means the view darkens or distorts if you are not looking straight ahead.
A helmet that does not clearly state its EN 379 rating is a significant red flag. While a 1/1/2/1 or 1/1/1/2 lens is still very good, a perfect 1/1/1/1 rating offers the clearest, most consistent view, reducing the guesswork involved in controlling the weld puddle.
❝ Pay close attention to the ‘light state’ shade, which is usually a 3 or 4. A clearer light state means you can keep your hood down more often for setup and tacking. This improves both safety and speed, as you are not constantly flipping your hood up and down.
Next, consider the shade range. Most auto-darkening helmets offer a variable range, such as shades 9 to 13. The correct shade depends on your welding process and amperage. As a general guide, lower amperage processes like TIG welding use lower shades, while high-amperage processes like flux-cored arc welding require darker shades. The Occupational Safety and Health Administration (OSHA) publishes a shade guide that lists both minimum protective shades and darker suggested shades for comfort. The suggested shades below are a common starting point.
| Welding Process | Amperage | Suggested Shade |
| Shielded Metal Arc (SMAW) | 60A to 160A | 10 |
| Shielded Metal Arc (SMAW) | 160A to 250A | 12 |
| Gas Metal Arc (GMAW/MIG) | 60A to 160A | 11 |
| Gas Tungsten Arc (GTAW/TIG) | Less than 50A | 10 |
| Gas Tungsten Arc (GTAW/TIG) | 50A to 150A | 12 |
Finally, look for modern lens technologies. Many premium helmets now feature “true color” technology. This reduces the traditional lime-green tint of older ADFs, providing a view with more natural colors. This makes it easier to distinguish the weld puddle from the surrounding base metal, improving your control and resulting in a cleaner weld.
Are extra sensors and grind modes worth the cost?
Yes, for a professional welder, these features are absolutely worth the cost. They are not luxuries; they are practical tools that solve common and frustrating problems. More sensors increase the reliability of the auto-darkening filter, while a grind mode streamlines the workflow between welding and finishing, directly improving safety and efficiency.
The sensors on a helmet have one job: to detect the bright light of the welding arc and tell the lens to darken instantly. A basic helmet might have two sensors, usually located above the viewing area. This works fine for simple bench welding in the open. But what happens when you are welding pipe or working inside a tight corner? It is very easy for your hand, the torch body, or a piece of the workpiece to block one of those sensors. When that happens, the helmet can flicker or, worse, switch back to its light state mid-weld, giving you a painful arc flash.
A helmet with four sensors provides crucial redundancy. By placing sensors in all four corners of the lens cartridge, it creates a much wider and more reliable field of view. It becomes nearly impossible to block all four sensors at once. This means the lens darkens every time you strike an arc and stays dark until you finish, regardless of your position. This reliability prevents eye strain and eliminates the lost time that comes from stopping to recover from a flash.
❝ When looking at a helmet’s features, pay attention to the physical placement of the sensors. Are they spread far apart to maximize coverage? Also, check the sensitivity and delay controls. Sensitivity lets you adjust how much light is needed to trigger the lens, which is useful in shops where other welders are working nearby. Delay controls how long the lens stays dark after the arc stops, which protects your eyes from the still-glowing weld puddle.
Grind mode solves a different but equally common problem. The sparks from an angle grinder are often bright enough to trigger a helmet’s sensors, darkening the lens. This forces you to either grind “in the dark” or switch to a separate grinding shield. Constantly swapping between a helmet and a face shield is inefficient and clutters your workspace.
A dedicated grind mode allows you to temporarily disable the auto-darkening function with the push of a button. The lens stays in its light state (usually a shade 3 or 4), giving you a clear view for grinding, cutting, or chipping. You get the full-face impact protection of the helmet without needing a second piece of gear. This simple feature saves a few seconds on every transition, which adds up to significant time savings over a week of fabrication work.
Frequently Asked Questions About Welding Helmets
Which welding helmet is considered the best? There is no single “best” helmet, only the best one for your specific work. A professional TIG welder might prioritize a helmet with a 1/1/1/1 optical rating and excellent low-amperage arc detection. A structural welder working outdoors might prioritize a large viewing area and rugged headgear. Evaluate a helmet based on its lens clarity, number of sensors, and comfort for the type of welding you do most.
How much does a professional-grade welding helmet cost? You should expect to budget between $300 and $600 for a high-quality, professional-grade auto-darkening helmet. Models in this range typically feature top-tier 1/1/1/1 optical clarity, four arc sensors, and highly adjustable headgear. Helmets with extra-large viewing areas or specialized features can cost more, while integrated powered air-purifying respirator (PAPR) systems represent a significant additional investment in respiratory safety.
Where are most premium welding helmets made? Many top-tier welding helmets, including those from major American brands, are assembled in the United States using globally sourced components. The complex electronics inside an auto-darkening filter are often manufactured by specialists in other countries. The key factors for you to evaluate are the brand’s quality control standards, warranty, and parts availability, not just the country listed on the box.
How do I choose between major brands? When comparing top brands, the decision often comes down to specific lens technology and ergonomics. One brand might have a lens with a more natural color profile that you prefer, while another might have a headgear design that you find more comfortable for all-day wear. If possible, try on different helmets to see how they feel and balance on your head, as comfort is a major factor in long-term productivity.
How long does a welding helmet last? The helmet shell itself can last for many years with proper care, but the auto-darkening filter is the component with a finite lifespan. Most modern ADFs are rated for 5 to 7 years of regular use before the liquid crystal display may begin to degrade. Consumable parts like outer and inner cover lenses should be replaced whenever they become scratched or clouded, as this directly impacts your ability to see the weld puddle clearly.
The Bottom Line: Your Helmet is a Precision Instrument
Choosing a welding helmet is less about buying a piece of safety equipment and more about selecting a precision optical tool. Your ability to control a molten weld puddle depends entirely on the quality of the information your eyes receive. Every feature, from the optical clarity rating to the number of arc sensors, is designed to remove a barrier between you and your work. A clear, reliable view eliminates guesswork, reduces eye strain, and allows for greater focus on the task at hand.
Think of the upfront cost as an investment in your own performance. A helmet with a 1/1/1/1 lens and four sensors prevents the frustrating flickers and flashes that disrupt concentration and can ruin a critical weld. Comfortable, well-balanced headgear eliminates the neck fatigue that degrades your skill over a long day. These are not luxuries; they are features that directly contribute to higher quality work and greater efficiency.
Ultimately, the right helmet is one that you can almost forget you are wearing. It should provide a clear, unobstructed view of the arc and the surrounding material, darkening instantly and reliably every time. When your equipment removes distractions instead of creating them, you can dedicate all your focus to what matters: laying a clean, strong, and precise bead.
About the author
This article is contributed by the technical team at Welding Supplies from IOC, an authorized online dealer for major welding equipment brands. The company offers a comprehensive inventory of welders, plasma cutters, safety equipment, and consumables tailored for different applications and skill levels, from hobbyists to industrial fabrication shops. Their platform serves as a resource for welders seeking specific gear from manufacturers including Miller, Lincoln, ESAB, and Hypertherm, providing detailed product information to support purchasing decisions.